


Grey Bedroom With Blue Accent Wall
Nothing breaks up a boring room and gives it dimension and texture like an accent wall.
Installing one doesn't take much time or money — here's an easy project for inspiration!
Materials Needed
- 6-inch utility knife
- Trim puller
- Mallet (Optional)
- Wood siding
- Titebond Construction Adhesive
- Nails
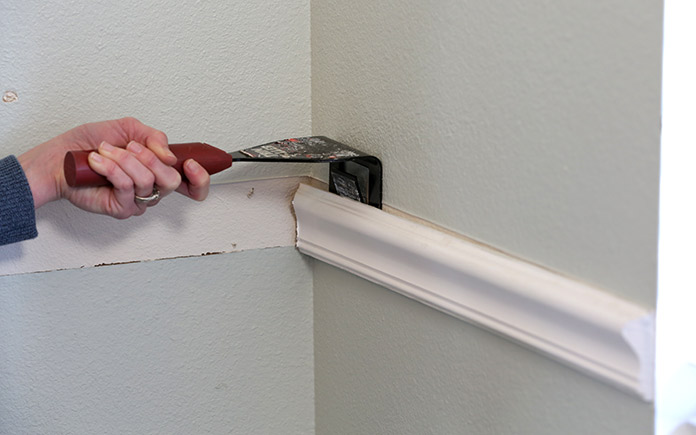
1. Remove the Baseboard
We begin our accent wall by removing the baseboard so it can overlay the new material we're adding.
Use a utility knife to score caulk on top of the baseboard. This, along with tapping on the baseboard with a mallet, will make it come off a lot easier.
Then use a trim puller to gently pry off the baseboard.
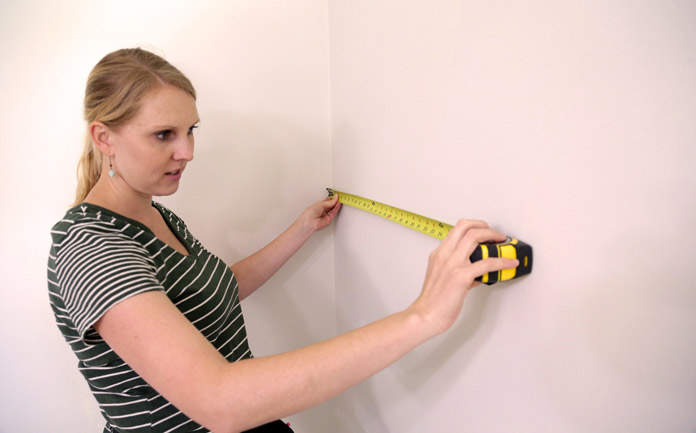
2. Lay Out the Grid
The material we're using for the grid is half-inch-thick by 6-inch-wide wood siding, which we're ripping down to three-and-a-quarter inches wide.
If you don't have the necessary equipment, you can ask the home center rip the boards.
Before we begin attaching it, we lay out perfectly plumb vertical lines, spaced evenly across the wall to guide the installation.
Next, we lay out the horizontal lines. Your spacing will depend on the size of the wall and the grid size you want.
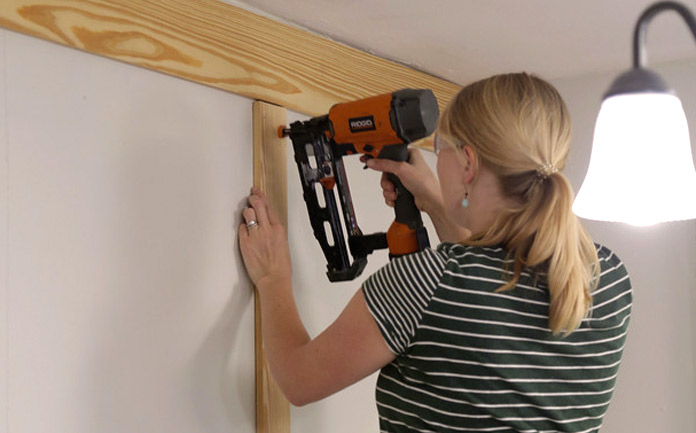
3. Install Top and Bottom Siding
At the bottom of the wall, we install a full piece of siding, so that it extends three-and-a-quarter inches above the old baseboard height. We use Titebond Heavy-Duty Construction Adhesive and nails because all of our boards won't land on studs.
At the top of the wall, we install another full piece of wood siding, and we leave a three-and-quarter-inch reveal for the crown molding that comes next.
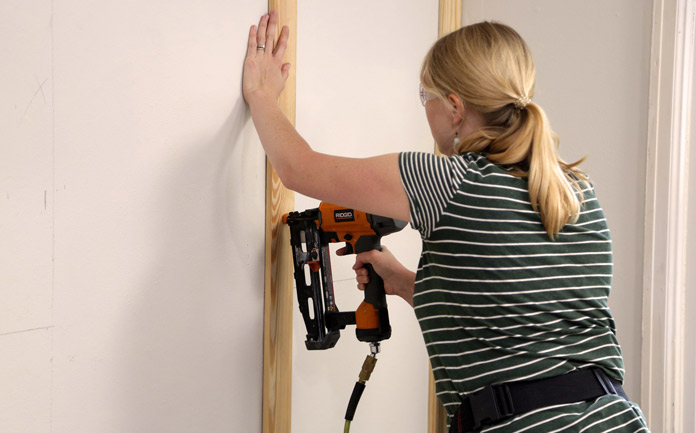
4. Install Vertical and Horizontal Pieces
Now we can cut and install the vertical pieces between the top and bottom boards. Construction adhesive is important here since some of these boards will only be nailed to framing at the top and bottom of the wall.
When we begin adding horizontal pieces, we're careful to measure each space precisely because there will be slight variations in these dimensions.
As each horizontal piece is installed, check both the level and the alignment with the adjacent horizontals.
5. Finish it Off!
When the grid is complete, you can prime the wood, caulk all the edges and apply the finish paint to wrap up the project.
Watch the video above to see the entire process!
Further Reading
- Behind the DIY: Accent Walls Enhance North Carolina Home
- How to Build a Floating Decorative Wall Shelf
- DIY Shoe Rack: How to Build and Install
Grey Bedroom With Blue Accent Wall
Source: https://todayshomeowner.com/video/how-to-build-a-grid-pattern-accent-wall/


Tidak ada komentar:
Posting Komentar